How to Install Exterior Jamb & Exterior Cladding?
When we examine the production of jambs and the mounting of jambs on exterior facades, we see that today, as a separate profession, it is a craft that requires skill and mastery. In today's construction market, it is possible to find jambs prepared in many different models and sizes, processed from metal alloys, polyurethane, polyester, wood, concrete and natural stones obtained from many different materials. These window jambs are ready for assembly. Such jambs are called ready-made jambs. Among the ready-made jambs, the most program share belongs to the polystyrene foam (styrofoam) jambs. Attaching the jambs to the sides and tops of the door and window is called assembling the jambs or assembling the jambs. Jambs on windows can also be applied under windowsills. Even ready-made windowsill jambs are available in the market.
Although the assembly differs according to the type of jamb to be mounted, it is basically assembled in the same way . According to the order of operation, the Assembly Exterior Jamb Assembly Application Procedure can be listed as follows;
+ The surface to be covered with the jamb should be smooth.
+ Necessary safety precautions should be taken while making jambs.
+ Adhesive mortar should be chosen reasonable for the type of jamb.
+ Heavy jambs should be firmly fixed in place.
+ Life assurance must be taken in the assembly of the jamb.
+ The assembly of the jamb should first be started from the side parts.
+ Jamb parts should be put in their place with plumb and balance.
+ Jamb joints should be corrected.
+ Excess mortar should be removed before it dries, joints should be leveled.
+ Preparation of the Jamb Assembly Area on the Exterior: The windows and door edges and their tops, if any, are cleaned by breaking the protrusions and brought to a ready state. The jambs to be mounted on the window sill and assembly tools (Saw, cuts, nails, pencils, meters, gauges, scales, spatulas, trowels, mortar preparation container and adhesive mortar) are brought to the assembly area.
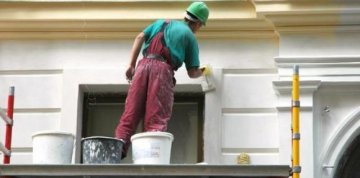
+ Bringing Jambs to Size: By checking the dimensions of the jambs, their height, corner angles and the places to be notched are brought to the desired values. Since the dimensions of windows and windowsills will not be of the same standard in construction (in the assembly area), the dimensions can be marked directly on the jamb by leaning the height and notch measurements to the surface to which the jamb will be attached. Since the jamb is mounted on the outer surface of the building, there is a risk of employees falling. For this reason, work should not be done without the necessary safety against falling.
+ Preparation of Jamb Adhesive Mortar: Jamb adhesive mortars are available in ready-made bags in the market. A reasonable adhesive mortar is selected for the type of jamb. It is prepared by mixing the adhesive mortar with water according to the manufacturer's recommendations.
+ Assembling the Jamb Side Parts: The jamb assembly starts from the side parts first. The side parts of the jamb, on which the adhesive mortar is applied, are placed in place with a plumb line. It is ensured that it sticks to the wall by applying blows by hand. Smoothness is checked with scales and gauges.
+ Assembling the Upper Jamb: After the side jambs of the upper jamb are connected, they are glued in place. If the upper jamb carries sideways from the side jambs, it is ensured that the overflow is equal on both sides by measuring with meters. The upper shore direction of the jamb and its parallelism to the ground are brought to the desired values with a gauge and balance. By applying hand blows on the upper jamb, it is ensured that the jamb approaches the wall and the adhesive mortar sticks to the wall. It is ensured that the pasted top jamb is securely attached to its place with concrete nails, etc. fasteners.
+ Final Stage of Jamb Assembly: Jamb joints are fixed with adhesive or joint mortars. Before the adhesive mortar dries, the mortar is removed with a trowel or spatula. Joints are smoothed with mortar.
Metpor
info@metpordekor.com
Okunma Sayısı : 136